 Journal
Your journal contains what's known about the Hex Wrights, and it's up to you to expand upon that knowledge.
It'll keep track of everything you discover.
This is the online version of the Hexwright documentation.
This page is built from the latest code on GitHub. It may describe newer features that you may not necessarily have, even on the latest Modrinth/CurseForge version!
Entries which are blurred are spoilers. Click to reveal them, but be aware that they may spoil endgame progression. Alternatively, click here to get a version with all spoilers showing.
The past is a foreign country; they do things differently there.
Rediscover the lost art of Hex Crafting, and learn to create your own magical tools and artifacts. This book is a guide to the ancient techniques and secrets of the Hex Wrights that have been recovered from buried workshops.
 Getting Started
This is our biggest breakthrough yet! A preserved Hex Wright Workshop, and it's intact! It looks like someone just popped out for a minute. There must be some serious magic at work here.
JournalYour journal contains what's known about the Hex Wrights, and it's up to you to expand upon that knowledge.
It'll keep track of everything you discover.
KyaniteOur first discovery, clusters of Kyanite crystal growing from the rock. It's a fascinating substance, and apparently quite rare.
It's very different from Amethyst and Lapis and it appears that it's not a source of mental energy but bridges mental energy to the physical realm.
Interestingly it only grows in small clusters in the caves besides sauces of heat deep underground. Apparently it's love for hot places has even caused very small amounts of it to spontaneously cross over into the Nether.
This substance is one of the pillars of a Hex Wrights' craft.


Every cluster sprouts from a block of Budding Kyanite, which slowly grows fresh clusters over time. It looks tricky to move without fracturing it into a million pieces.
 Essence
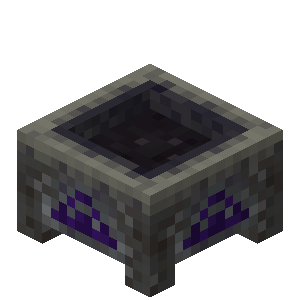
Something we'd long suspected but have now confirmed is the existence of Essence! This is the Physical energy counterpart to the Mental energy we've long been using to shape this world. It's present in everything! The true discovery is that it can be extracted using a crucible.

This appears to be the main way Essence was stored. A simple leather pouch inscribed with numerous runes designed to absorb and distribute the essence given to it. It feels odd to be handling energy like it's a physical object.
 Your Workshop
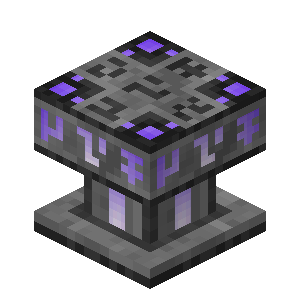
Starting out requires only a crucible to start turning items into Essence. You then want an Essence Forge to forge that Essence into useful items and devices. Eventually you'll want a Staff Assembly station to put those coresyou build to good use.
A Good Hex Workshop is an automated one. All of the work stations can be automated with either traditional tools like hoppers and redstone, with hex, or both.
One example we've recovered from a past Hex Wrights diary speaks of using Warding Boxes to detect dropped items.
These items were then redirected to a hopper feeding into a crucible.
A transducer placed on the crucible would signal when the crucible was done and would signal an emitter to start a few coalescers producing desired items.
This was just one example, there's many different approaches one can take.
 Recipes
We currently only have a few examples of Recipes for the Essence Forge as we're still discovering the lost knowledge of the Hex Wrights but Stone tablets seem to be the best documentation of their creations so far. We've had luck sourcing some from ruined workshops but
the best source we've found are things called Bindstones that are found in large caverns underground. They don't seem to be very stable but they have enough energy to impart some knowledge when interacted with.
Fire & EssenceEssence is the core material of the Hex Wright and is found in everything. It can be extracted, stored and reforged.
Crucible


Burn items in the amethyst infused Crucible to extract their essence. Unforunately not everything can have their essence extracted, it's seems some experimentation is in order.
The discoverd lab notes also has some diagrams indicated it can be fed using mundane means, like a hopper.
Hex Wrights appear to have been practical, if also not a bit eccentric. I think modern Hex Casting could easily do a better job than a simple hopper.
It's handy I can keep all my experiment notes in my journal.
Endless Pouch


An Endless Pouch is what holds essence. It can hold far more than an average container. This is what's needed to store and use Essence in the Hex Wright's workstations.
Returns a list of the Essences in a pouch at a location. Returns null if that Essence isn't present.
Returns the amount of Essence in the pouch at vec location. Num is the aspect's place in pouch order from Essence Purification.
 Essence Forge

Dock an Endless Pouch or Resonant Key, choose what to make and hone your skills as you forge hex casting implements.
Each Essence needs to be infused by striking the forge. Striking when the needle crosses the brightest zone is a perfect strike.
Your accuracy across every round decides the final quality. Each round reduces the strike zone and the needle moves faster.
Not every recipe is available straight away, the must be unlocked by finding knowledge left behind on Stone Tablets
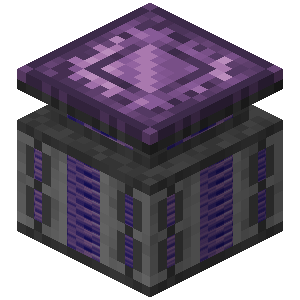 Coalescer
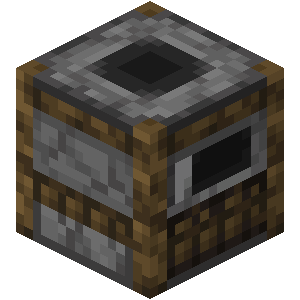
The opposite to throwing things into a crucible to burn.
This crafts items from Essences.
Not every item is craftable though.
Turning items into Essence always results in some Essence loss. This has been given the nickname 'The Wizards' Share'.
It will always cost more to make an item than what you get from the item in the Crucible.
The Coalescer requires an example item to know what to make. The item isn't consumed, it's just a blueprint, or the seed, as it's known.
You can use a physical item, or use a hex to create a representation of the item.
Causes the Coalescer at the given position to create the number of items specified.Costs 1 Dust
Vector is the coalescer and it creates an example item seed from an item type iota.Costs 1/10 Dust
 Leywell
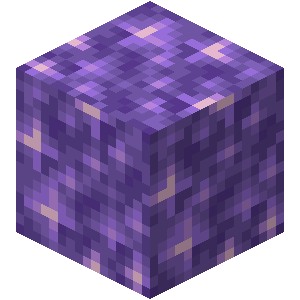
The Leywell is my poor imitation of the devices built by our ancestors created by studying the few remaining texts of the Hex Wright masters. It extracts Essence from the surrondings.
Placed Leywells do nothing until they're attuned, at which point they passively extract Essence from their surroundings. My initial test was in a forest which yielded me Organic Essence.
 Hex Wrighting
These are the key tools and knowledge any good Hex Wright needs.
Stone Tablet
Not every recipe is available straight away, they must be researched by finding stone tablets, ancient knowledge stores created by Hex Wrights and preserved by magic. We're finding these in hotspots of Hex Wright activity.
QualitiesA lot of what a Hex Wright crafts is complex, it requires patience and skill. This is reflected in the Quality of the item produced.
The better quality an item, the better its effect or stats are.
There are 5 levels of quality that can be achieved and these determine the finals effects of an item.
MasterworkExquisiteFineSoundCrude
Wright's SpectaclesWorn by all the great Hex Wrights of the past, these specs allow you to see the properties of a Hex Wrights workshop. You can see info like the perimeter of a Warding Box, the channel and media of an Emitter, the name of a Resonance Tower. Any properties like these.
A Wright does need to not choose between the fashionable specs and a Scrying Lens. Simply mash combine the spectacles with a lens in a crafting table and the lens is fitted into the frame. You get the best of both worlds!
The Inscriber
Used to etch the Hex Wrights signature into their creations.
First use lets you imprint your signature. Careful, once it's imprinted, it can't be redone.
Once it's imprinted, hold the Inscriber in the main hand and right-click anything you've crafted in the off hand like a staff, a core, or a broom, and it etches your mark.
 Casting Tools
Hex Wrights can build a variety of casting tools to aid theirs and others Hex Casting. From Staffs to Ambit Extenders.
 Pocket Caster
A handy device that has a slot for a focus and a small inventory. Clicking cast will put the items as entities in a list on the top of the stack and cast the hex on the focus.
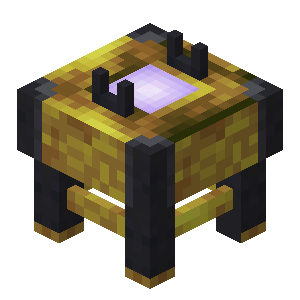 Staff Assembly Station
Build and customise your own staff.
It's more than just a recipe, it takes skill and understanding to customise it to your needs.
Everything starts with a staff blank, which on its own, does nothing. The next step is to combine it with a staff core. Staff cores dictate the ability a staff will have.
You can stop here but it's strongly advised you add ingredients to craft a wrap, focus, and catalyst.
You can add up to 6 ingredients each for the wrap, focus and catalyst. Choosing the right ingredients is key, the better suited an item is, the more attuned it will be. The attunement is indicated below each component. There is a max attunement per component and for the entire staff.
Efficiency is a measure of how suited the ingredients used for components are. A component might give you a good attunement score but it might not be the best you could use, so whilst you might have brute forced things, it isn't very efficient.
Quality dictates the finished level of the staff. A staff can be a Masterwork, Exquisite, Fine, Sound or Crude.
Quality is derived from a high attunement score and a high efficiency score. A low score in either can bring down your overall quality.
 Staff Cores
A core is the heart of all staffs, each one giving it's own unique ability.
Created at the Essence Forge, they range from Masterwork to Crude. The better the quality, the better the effect of the ability.

Allows the wielder to create a zone around them which continuously casts whilst channelled. The stack always begins with what's in the zone: [[hostiles], [animals], [items], [players]], null list if none.
Narrow with Wielder's Gambit.

Gives the wielder more affinity for Greater Teleport, discounting it's cost and preventing any accidental spillages. Only applies to the wielder or items. No discounts or protection for other entities or players.

It's internal structure resembles that of a Hex Caster with the greatest of memories.
This core gives the wielder access to a Hexicon. Simply equip the staff and press the bound Hexicon key.
Wielder's Gambit has no effect on this core.
Gives a staff the ability to fire an energised Hex Bolt. Bolt has an ambit at impact point, which is affected by core quality. The stack begins with: [impact vec, [entities caught]].
Hex is written to the staff using Engraver's Gambit.

A repository for great spells, easily accessible when casting.
Wielder's Gambit takes a number corresponding to the slot and deletes the stored Great Spell. Left click with scroll and staff in hand to store.
Affects staffs with specific cores and has a different effect depending on the core.
Staff must be in hand.
Quartz: Sets the size of the zone. No narrower than 4, and no wider than the core max. Mishaps otherwise.
Mnemonic: num is the the slot of a Great Spell to erase, top of the list is 0, next down is 1, then 2, etc.
Scribe's Gambit for staffs and weapons. Null erases it.
Scribe's Reflection still reads them.
Talismans
Talisman are small pieces of parchment that can be worn and can carry a hex. The contained hex will cast when the given conditions are met.
Crafted blank, they can have a hex written to them using Scribe's Gambit. Costs 5 dust.
Talisman cast as the holder, with the holders ambit, using their media.
Mishaps also occur for the holder. They are only active when worn in the appropriate Talisman slot. You have 3 Talisman slots.
The final part of a creating a Talisman is making it distinct so it's easy to tell apart.
Sneak + right-click will let you draw your own Talisman identifier, but only when it's blank.
You have 16 colours to choose from when drawing.
Sets the conditions of the Talisman. First number is the trigger, second is the context.Costs 5 Dust
The trigger is when the hex casts.
0 Struck:you are hit
1 On Kill:you land a killing blow
2 Mishap: staffcast of yours errors
3 Use:you right-click it
4 Hurt:you deal damage to something
5 Wound: you take damage from a hit. If a hit doesn't do damage due to armour, wound is not triggered.
6 Death: you die
7 Break:an item of yours wears out
8 Mine:you break a block
9 Traverse:you cross into another dimension
10 Interact: you right-click a block or a creature
Context is the iota at the start of the stack.
0 Self:your entity
1 Other:entity relating to trigger
2 Magnitude:number related to event
3 Gaze:what you see (max 16 blocks). Entity or Vector.
4 Position:your position or events position
All combos of trigger and context work. Struck with Other seeds the hex with who hurt you; Hurt with Other gives it whom you hurt.Other is your attacker under Struck and Wound, and is your target under Hurt and On Kill. It's also your killer under Death.
Struck: the damage thrown
Wound: hp lost
Hurt: the damage you dealt
On Kill: Killed entities max health
Death: last damage you took
Mine: blocks hardness level
Some triggers can generate Null. For example, Mishap, Use, Break and Traverse all return Null if the context is Magnitude. Struck can also return Null if the damage source is a fall, or fire, for example.

This Talisman was the pinnacle of Hex Wright skill. It casts on the brink of death, giving you two seconds of total immortality, before casting the inscribed Hex. The cost is a 5 minute cooldown.
 Warding Box
An autonomous caster with a configurable trigger.
The Warding Box will fire when the configured trigger crosses into its boundary. The entity that triggered it will be put onto the stack and the stored hex will be cast.
Inscribe by casting Chronicler's Gambit at the box's position. It can be given media by hand or by casting Recharge Item at its location with media lying in the ward volume.
The volume and trigger can be configured manually or by hex.
The Warding box active state can also be controlled by redstone.
The Warding Box's Ambit is the size of the ward cuboid plus 4 blocks additional in all directions. This allows the Ward to act as an alarm of sorts by things outside it's area, such as by triggering a bell or closing a door.
Sets the Warding Box trigger to a specific entitytype or itemtype. Manual trigger setting resets this.Costs 1/10 Dust
Returns the upper and lower vector of the ward cuboid for the Warding Box at the position vec.
Sets the size of the wards cuboid. Takes a list of two vectors, upper and lower points of the cuboid.
The vectors can be in any order, upper and lower or lower and upper.
The hex will mishap if a size larger than the ward can generate is provided.
Costs 1/10 Dust
Moves an entity from it's current position to the position specified.
Costs 1/20 dust.
Both the entity and the destination of redirect must be within the Warding Box's cuboid. Despite the box having an ambit of the cuboid +4 blocks, redirect only works within the cuboid itself.
 Resonant Field
The Hex Wrights of old were renowned for their huge workshops and their total dominion over them, often casting hexes affecting their workshop hundreds of blocks away.
This is the modern attempt at recreating that.
The Resonant Field Marker allows ambit to be artificially extended by placing 8 of them in a cuboid formation.
The eight corner blocks must be perfectly axis-aligned across all faces of the cuboid.
Max length of any dimension is 200 blocks.

Right-click each of the eight markers with the tuner, in any order. The field becomes active on the 8th.
Sneak-click a marker already in a field to remove it from the group. Sneak-click elsewhere to reset the entire tuner.
Whenever you stand within an active Resonant Field, your ambit will be the entirety of the inside of the field.
Your personal ambit still exists also, so standing by the edge of a field, you'd still be able to influence things in your range outside it.
 The Hexicon
A magical book capable of holding 72 hexes. There are 8 chapters, each with 9 pages, and each page can hold a hex. Change the cover by casting Caster's Glamour with it in hand.
Hold your Hexicon Selector key for a quick select. Press a number to select or use the mouse wheel to move chapters.
Double-tap the same key to open the full editor instead, where you can flip through every chapter and write or rewrite any of the seventy-two pages.
Use Scribe's Gambit to write to a selected page, or Engraver's Gambit through a Scribe Core staff.
Use Scribe's Reflection to read the hex on the current page.
 Void Pocket
Created at the Essence Forge, this little device is a self contained tiny pocket universe with just enough storage for 25 casting related items if crafted skillfully. Each grade grants 5 slots. Think of it as a hotbar for your hotbar.
Hold your Void Pocket Overlay key with a Void Pocket. Whatever slot your mouse is over when you release the key is the item it'll be switched to. You can only add hex related items, but this lets you quickly switch between different things without having to rifle through your inventory.
We all know how easy it is to accidentally lose a pocket universe, that's why this one was created with a homing feature.
If you lose your Void Pocket whilst it has an item selected, through accidental lava interaction, placement of the currently selected item, or any other numerous ways, then the Void pocket will eject the item
it's holding and use that spare energy to return to you.
A word of warning though, if you don't have an item selected, then the Void Pocket and all its contents will be lost or destroyed.
 Shaped World Crystal
The heart of every Golem, or I should say, the mind of every Golem. They hold a pocket dimensions containing the complex machinery of an artificial mind.
Unfortunately this pocket dimension is served as soon as the Golem is rendered
non-functional but that doesn't mean it is totally inert.
The thousands of ancient hex patterns minutely etched throughout the crystal can be manipulated to exert some influence over space-time. Our lead researcher discovered a pattern that can manipulate the orb into bridging two points in space.
Takes two sets of vectors forming two planes, folding them to occupy the same space time for the
amount of time specified in num seconds. This gives the effect of a window which can be stepped through in either direction.
It doesn't come without limits though as each plane must match in size and must exist (be loaded) in the world. It will mishap if not.
 The Resonant Anchor
A spatial anchor forged with the same resonant frequency as Amethyst.
Greater teleporting to it's position prevents any accidental loss of personal belongings and deals with the rematerialisation of those teleporting.
Aim a Greater Teleport at a tuned anchor and the cast is free and drops nothing. Accuracy is key though, work out an offset from your eyes for example and you'll be in for a standard Greater Teleport rough landing.
A Resonant Anchor can be tuned to a specific pattern (number or string). Doing this allows you to create networks of anchors that can be found by using the pattern with the Resonant Anchors' Ledger. You can still use Anchor's without knowing the pattern. This is more a lookup.
Give it a pattern and it will return every Anchor tuned to that network in the same dimension, as a list of vectors.
 The Resonance Network
The key setup for any serious Hex Wright. The Resonance Network allows wireless transmission of Essence at its core but over time this use evolved to sending and recieving iotas.
Resonance Tower

Right click a Resonance Tower with an Endless Pouch to dock it. All attuned Resonant Keys in the area will take and deposit Essence to the attuned Tower and the docked pouch.
Every Tower has a unique resonance and an identifier, like Rowan or Thorn.
That identifier is only a label for easy reference. Handy for seeing what keys and items are tuned to.
It also means you can rename the tower without any attunted keys or items breaking.
Cast Chronicler's Purification on a vector pointing at a Resonance Tower and it returns a resonance iota which is its' unique id and what the network Keys are attuned to.
Cast Chronicler's Gambit on that same vector with a string, and the network takes that string as its identifier.
 Resonant Key
Right click a Resonant Tower with a key to attune it. Attuned keys can be slotted into pouch slots and if they're in range of a Resonant Tower they will put or pull Essences from the Tower. They can also tune other devices to a network.
 Essence Gauge

Use a resonant key (or pouch) on the gauge and right-click to choose an aspect to monitor. A comparator reads one strength per 20 essence. Sneak-click to take the source back.
 Harmonic Exchange
A Harmonic Exchange adds 16 harmonic channels to a Resonance Network. Messages sent to the harmonic channels are forwarded to all devices subscribed.
Connect to a network using a Resonant Key.

Each network can carry 16 harmonic channels. Certain items, like a ring or emitter, can subscribe to these channels.
A channel can either be broadcast to or have it's state set and subscribed devices will be notified when this happens and react accordingly.
The difference between a broadcast and state is that a broadcast is short lived, only those subscribed to the channel at the time of broadcast will get the data.
Setting state will also send data to those subscribed but will also be sent when an item first subscribes. A channel only has one state.
The Exchange itself must stand within 48 blocks of its Resonance Tower, and be in the same dimension.
The Exchance itself has unlimited range, and can transmit across dimensions.
 Harmonic Channels
There are two ways to put an iota onto a harmonic channel. One sends to all actively listening, the other sends and saves it as state, re-sending to those who join channels.
Resonance can be got by casting Chronicler's Purification at a Resonance Tower.
This is Publishing. Whoever is listening at that instant hears it, and then it is gone.Costs 1 Dust
This is Setting State. Whoever is listening at that instant hears it. Whoever connects to
the harmonic channel later also hears it.
Each harmonic channel has its own state.
Setting that state replaces the current state.
Costs 1 Dust
"A mob just died at the north gate" is an event, so broadcast it.
"The door is open" is a fact, so set it as state.
If someone arriving after a message needs to know, it must be set as state.
Returns what network an item is attuned to or null, if not attuned.
Resonant Rings
Attuned to a Resonance Network by right clicking a Resonant Tower with it. A ring can then subscribe to an Harmonic Exchange. A ring must be worn in the accessory slot to be connected to the Resonance Network.
Every worn ring attuned to the same tower is on one network. The Harmonic Exchange provides 16 channels to subscribe to.
The ring will cast the hex attached when it receives data broadcast on that channel or the channel's state changes.
Sets a ring in the off-hand to listen to a harmonic channel and execute the pattern when data is received.Costs 1 Dust
Each ring's hex runs as its own wearer. Their media. Their ambit. Be careful what pattern you subscribe with.
You can broadcast when you receive data or state but the chain breaks after 1 reply . You cannot build a message loop, ironic given they're rings.
 Harmonic Emitter
A harmonic subscription device like the ring but instead it is placed.
Give it a harmonic channel and a hex, when that channel receives a message, it will cast its' Hex. Has a 4 block ambit.
An Emitter requires a resonant key to connect to the desired Network.
Connecting it alone is not enough, it also needs to be tuned using Emitter's Gambit.
Tunes the Emitter at vec to num channel with pattern to cast. Null to stop. Costs 1 Dust
Unlike a ring that can hold up to 3 subscriptions, an Emitter can only handle one channel. You can use multiple emitters for different channels or the same channel if required.
Returns the vector location of the emitter. Only works inside an Emitter's cast.
The emitter has a limited ambit of 4 and a media reserve of 500 dust. This must be filled manually by right clicking the emitter with a media source.
Right clicking the emitter will bring up a summary. It provides information about network, channel attunement, messages and media.
 Harmonic Transducer
The counterpart to the Harmonic Emitter. A Harmonic Transducer attaches to block and sends a signal when a monitored property changes. It's a limited caster with an ambit of 4 and a manual media store.
A Transducer clips to the face of whatever you place it against, like a torch, and monitors for changes.
It takes a Resonant Key the same way an Emitter does and must be within 48 blocks of a Resonance Tower
Right click a transducer to configure what property of the block it's attached to to monitor and trigger on change.
There's currently no hex to configure a transducer as the trigger properties are dynamic. Emitter
Two triggers built in triggers:
Any Change fires when the state changes at all, and sends the position where it happened.
Comparator is equivalent to redstone comparator signal. It is the coarse, universal way to watch contents like a chest filling, or a furnace's progress.
What the transducer sends over it's conifgured channel depends on what it is monitoring. It could send a boolean, a number or a string.
Experimentation and reveal are your best friends here.
Tells the block at that position which harmonic channel to transmit on. Null resets channel.Costs 1 Dust
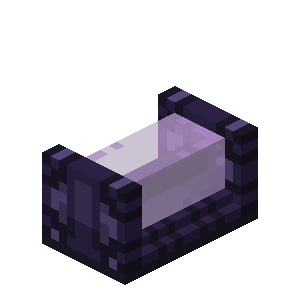 Exchange Bridge
Two networks, one shared channel.
Dock a Resonant Key from each of two towers, give it a harmonic channel, and they become linked. Messages published to a networks channel will appear on the other networks channel.
Each bridge can link one channel across networks. It can be placed anywhere, even in another dimension. It's spatial properties mean it doesn't have to exist within the 48 ambit of a Resonance Tower.
The keys must be attuned to different towers. A bridge from a network to itself gives you no benefit. Luckily right clicking the bridge holding anything but a resonant key will show open a summary that highlights these errors. You can also add keys in this menu or right click the bridge with a key to place it.
Bridges can be chained up to 4 hops. That's four different networks that can reached on one channel. Beyond that the messages are dropped quietly.
Bridges are also loop safe. Messages won't repeat on the same network if two or more bridges are connected in a loop.
A bridge doesn't require the chunk its in to be loaded. It will function fine in any location.
Small note on the summary display shown when right clicking a bridge, the summary message count doesn't include any messages recieved whe the bridge was unloaded. It is more a diagnostic tool than an accurate count.
The Harmonic Channel that is bridged can be tuned using Tuner's Gambit. Using null with that pattern will disconnect the bridge.
 Field Utility
Items that help outside the Hex Wright workshop!
Armour & Robes
There are six armour types currently. Augur,Hexwarden, Cantor, Veilwalker, Venator and Domitor.
Each has a unique ability and 4 quality grades, from Sound to Masterwork.
You must wear at least 3 pieces of the same set for the abilities to work, and one piece must be a chest plate.
The pieces need not match in quality - a mixed suit works at the quality of its weakest piece.

The Augur armour bestows the power of foresight.
When drawing patterns you will be shown the next possible steps and pattern names.
Requires Augur Gem to craft

The Hexwarden armour wards the wearer against mishaps.
An amount of damage, blindness, XP loss, dropped or drowned is soaked up by the plate before it reaches you: 25% at Sound, up to 100%.
The Cantor armour gives the wearer their own additional ravenminds. A new pattern gives them up to 4 additional Ravenminds, depending on the quality of the armour. Masterworks giving 4 and Sound giving 1.
Huginn's Gambit, but for one of your additional minds. Give it null to empty that mind again.
Muninn's Reflection, but for an additional mind. A mind you have never written to reflects null.
The additional minds behave exactly as the ravenmind does. Minds survive from one pattern to the next within a cast, and across a whole staff casting session, Talismans also have access to the extra minds, they are blank each time the Talisman hex fires.

The Veilwalker armour is sewn with hidden pockets, and carries more talismans.
It adds a talisman slot per quality: 1 at Sound, up to 4 at Masterwork on top of the existing 3.
Requires Veilwalker Gem to craft
Taking it off does not empty the pockets but it does disable the Talismans in the extra slots. Taking those Talismans out the disabled slot will result in that slot disappearing until a Veilwalker Chestplate is worn again. It will also enable any disabled Talismans.

The Venator armour was designed to compliment Hex Wrought bows. It shortens the bow's hex recharge by up to 40% at Masterwork with up to 90% chance to return an arrow.
Requires a Venator Crystal to craft.

The Domitor Chestplate is tempered against fire and blasts. It absorbs a portion of any explosions or fire damage: 25% at Sound, 50%, 75%, and total immunity at Masterwork.
Requires a Domitor Gem to craft


The void represents a blank space. This was added due to constraints in showing recipes with quality variants of the Gem.

The void represents a blank space. This was added due to constraints in showing recipes with quality variants of the Gem.

The void represents a blank space. This was added due to constraints in showing recipes with quality variants of the Gem.

The void represents a blank space. This was added due to constraints in showing recipes with quality variants of the Gem.
 Armaments
Hex Wrights believed not everything could be solved with a Hex; Sometimes you need to smack things in the face. Luckily they were also Hex practitioners, so they combined the two.
 Battle Hammer
A heavy two-handed beast of a weapon, great for clearing room. Right click to slam it into the ground and send a wave rolling outward, knocking back and hurting everything caught in the shockwave radius.
Created with enough Arcane Essence to be able to take a Hex Pattern inscribed by Engraver's Gambit. Everything caught in the shockwave will be put as a list onto the beginning of the stack.
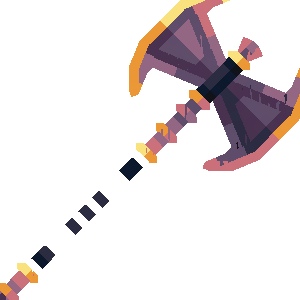
Battle Axe
The Battle Hammer's sharper twin, two handed and specialised in slashing. Right click to cut a wide wedge in front of you and fire a crescent energy slice in the direction you're looking.
Inscribe it with Engraver's Gambit and the
hex fires once the energy dissipates and puts all entities sliced as a list onto the beginning of the stack.
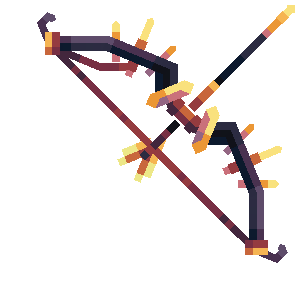 Archer's Great Bow
A heavy bow that can be inscribed with a Hex using Engraver's Gambit. Any normal arrow fired will be imbued with this hex which will activate on contact with an entity. The entity will be put onto the beginning of the stack.
There is a small cooldown between imbuements during which time the arrows fired will behave as normal arrows. Quality level affects the cooldown and damage dealt.
The quality also affects the chance to refund an arrow when firing.
Also affected by the Vantor Armor.
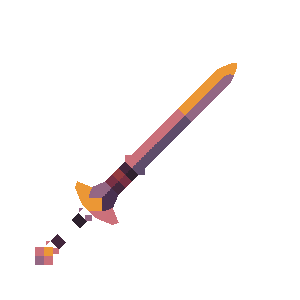 Duelist's Short Sword
No right click, no hex, nothing hidden in it, just a light blade meant for hitting faster than whatever's swinging back at you. If you can't beat them with hex, dazzle them with fast hits to the face.
ArtifactsThese are items crafted by the original Hex Wrights using techniques that are still lost to us.
Some are weapons, some grant utility and some contain immense power.
They're can be found in abandoned Hex Wright structures or even powering their creations.
You can keep track of them in your journal.
Advanced work, even amongst the Hex Wrights. The binding of an extracted abilited into an orb, that allows its wearer to channel the power.
A Power Orb holds a single ability, allowing the wearer to channel it.
Even amongst Hex Wrights, this was advanced and complicated work and the ability to recreate them has been lost to time and studying them shatters the orb.
An orb must be given a sigil, a unique pattern, using Scribe's Gambit.
The Orb must then be placed into the appropriate accessory slot and drawing that pattern activates or toggles that ability.
Orbs can be dyed like leather armour.
The most advanced power orb gives it's wearer control over Amethyst Dust. The orb has hundreds of thousands of Hex Patterns etched into the inner surface and exposes a set of simple patterns for the user to easily control thousands of individual dust particles.
Packed tight, you can stand on dust, it's solid, it holds back water and it hurts to be hit by it. Spread too thin and you lose these properties.
It all depends on how much dust you use and the size of the shape you conform it to.
Dust is lost whenever it does something, like striking things, carrying things or holding things trapped inside.
When this happens, your dust is topped up from your media.
If you take the orb off or leave the dimension, you lose the dust.
Spread dust into the air and seize control of it. Max amount is 500 amethyst dust.
Once dust is released, you never get it back, it's spent.
If you lower the dust amount, the effect is instant as control is dropped for the difference in dust, but if you increase the amount, it takes time to flow from you to the formation. So increasing the amount isn't a way to instantly patch a damaged formation.
Throws the dust along the vector, between 3 and 24 blocks out, before returning. Directing it mid-throw bends it.
Formed dust is solid to everyone, you included.
Forming any other region, even the same shape somewhere else, reforms the dust. To move a formation without reforming, use Impel or Move.
Formations more than 48 blocks from the caster returns to dust.
Moves the formation in the direction of the vector, in blocks per tick (length of vector). Max is 1. A zero vector stops it.
Carries the formation until its centre is at the position. Acceleration is dependant on size and distance.
Anything standing on a moving formation is carried along with it.
Impel keeps going until you tell it otherwise. Move stops by itself when it gets there, and the position has to be within your ambit. Impelling a formation whilst moving abandons the move.
True packs the dust to the skin of the formation, allowing entities to enter but not exit. False reverts this.
Casts the patter(s) after the dust has finished what it was last told to do. Maximum 16 queued at a time.
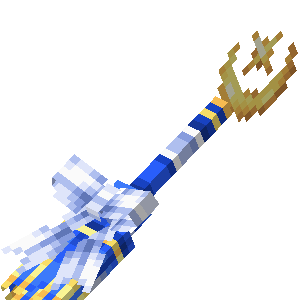 Flying Devices
Flying devices controlled by Hex
Broom & Carpet
Built for speed, brooms were the quick method of long haul travel favoured by Hex Casters of old.
They're ridden like any mount, but powered by hex.
Quality affects max acceleration & speed.
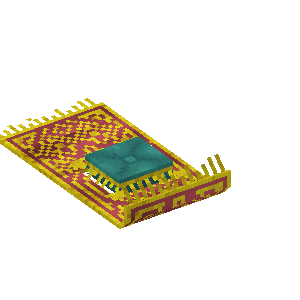
Steadier than a broom and no slower, this was the preferred way of travelling long distance in comfort.
Seats two or a driver and a chest, and holds a deeper reservoir.
Quality affects max acceleration & speed.
Carpets can have chests mounted to them by using a chest on a carpet. It can be accessed by using the chest.
To remove a chest, sneak and right-click when the chest is empty.
Most brooms are struck at the Essence Forge, and fly by the grade they were struck at.
Three are not. Starbeam, Nightsweep and Twin Whisk are only ever found - in the deep places, and in what a quartz golem hoards. No tablet names them and no strike makes them.
They outfly anything the Forge can produce, and they carry no grade at all.
Some brooms were built for company. Starbeam, Nightsweep and the forged Gleamglide each carry one behind the pilot; the Twin Whisk has a bench either side of the shaft and carries two. Passengers cost the broom lift.
Patterns
Can only be cast by a broom or carpet. Returns everything the vehicle knows about this moment.Free to cast
List contains, in order:
vec: Rider input
vec: Facing
vec: Rightwards
vec: Velocity
num: Climb speed
num: Ground speed
vec: Last acceleration
num: Media
[any]: memory from last cast
Rider input is your controls, not a direction: x is strafe, y is climb, z is forward, each -1 to 1. Pair x with Rightwards, z with Facing.
Last acceleration is what was really applied, after your throttle was scaled and shortened.
Your vehicle's three limits, these are flying device constants and won't change mid flight.Free to cast
Puts everyone off - the pilot, and every passenger on a carpet. True leaves the vehicle hovering where it stopped; false packs it back into the pilot's inventory.Costs 1 Amethyst Dust
Your hex carries on to its throttle as normal - there is simply nobody left to fly for, so the vehicle parks (or is already in your bag).
You still fall. Nothing catches you.
An empty reservoir cannot pay for this, and the vehicle mishaps instead: you are dropped either way, just less tidily.
Returns the Broom or Carpet itself as an entity. This is how you read its position.Free to cast
Flight HexesWrite the flight hex with Scribe's or Chronicler's Gambit before you mount as there's no way to edit it once you're in the air.
You can either a throttle vector or a [throttle vector, [pattern for memory]] on the stack.
That vector is a throttle, not a speed: a direction, with a length between 0 and 1.
1 is all the acceleration you have, 0.5 is half of it. Your vehicle multiplies it by its own max acceleration, so no seperate hexes for different speed brooms or carpets.
Ask for more than 1 and it is simply shortened back to 1. So (1,0,1) and (2,0,2) are the same request: full power, south-east.
Return (0,0,0) to coast. A light drag bleeds speed off slowly so to break efficiently you point the throttle behind you.
The throttle points in world directions, not your own. That is what Facing and Rightwards are for: they are flat, length 1, and already turned the way you are looking.
Returning Facing alone is full throttle straight ahead.
Flying costs media.
You pay once each time the hex runs: a little just to hover, more the faster you go, a little more to climb, and most of all for abrupt accelerations
Around half speed covers the most ground per dust.
24 dust, about five shards, gets the following:
Hovering: 3 minutes
Half speed: 90s, 840 blocks
Flat out: 35s, 660 blocks
Climbing hard: 25s, 210 blocks up
Overspeeding: 1 second
Finer brooms fly faster on a bigger tank for the same cost per second.
The broom wants a throttle on the stack at the end as the vector value: which way, and how hard?
The vector you return is the which way and the value of each component is how hard, a 0 is nothing and 1 is every bit of acceleration the broom or carpet has.
Think of it like a joystick, you can move it in any direction but can't push past the limit. And it's a circle, so diagonal is no further from centre than straight ahead is. This is how the return vector is capped.
(1,0,1) which is diagonal, is no faster than (1,0,0) which is straight ahead.
The one rule: you can't ask to go faster when you're already at top speed. Full throttle is perfectly safe at lower speeds but will take you over top speed at higher speeds.
The question you should answer with a heix is 'how hard should I push' not 'how fast do I want to go'. You're adding force to push, not setting a speed exactly.
Take your ground speed. If that plus max acceleration still fits under max horizontal speed, return Facing for full throttle ahead. Otherwise return (0,0,0) and coast.
That is a complete flight hex and it never overspeeds. It does surge, though.
Push past your limits and the broom drinks media, roughly x30 the usual, and your speed readout turns red.
There's a small grace period of three hex executions and after that the penalties will begin.
Vehicles hold their own media, and start drawing from the rider once that runs out.
Return anything that is neither a vector nor [vector, list], a memory that is not a list, or an ordinary Hex mishap inside your own hex.
Any of those converts the vehicle back to an item and drops you.
The simple hex surges: accelerates flat out, hits its threshold, coasts until drag drops it back then accelerates flat out again.
For smooth flight, build the velocity you want, subtract the velocity you have, and divide by max acceleration.
want = Facing x (forward input x max horizontal)
+ Rightwards x (strafe input x max horizontal)
+ (0,1,0) x (climb input x max vertical)
Then (want - Velocity) / max acceleration. It steers, brakes, climbs, and can never overspeed.
 Storage
Ancient Hex Wrights needed places to put everything they wrought and spent many hundreds of years perfecting these tools and devices.
The Manifold Vault


Space folded in on itself to produce a storage vault capable of holding stacks of 54 items. They can be imprinted with Seals.
 The Vault Seal
Vault Seals provide access to a Manifold Vault over any distance.
Forged at the Essence Forge they are blank until used on a Manifold Vault, which then imbues a spatial imprint.
A seal can be docked in a satchel or chest, worn, or held. The order of priority for a seal when being read is. Docked Seal -> Worn Seal -> Carried Seal.
There are 3 patterns to access a Manifold Vault using a seal.
Returns a list of every slot in the Manifold Vault, empty ones included, as Stacks in slot order.
Put the item entity in the Manifold Vault at the slot given. Player cast displaced items go to inventory.Costs 1/10 Dust
Withdraws item at your feet, returning that item entity. Player cast goes to inventory or feet if full. Costs 1 Dust
When this pattern is used in a Sealed Satchel or Hexbound Chest withdraw hex, the item is placed at your feet and then under your cursor in one tick, fast enough that the item never appears on the floor for someone else to pick up. It is placed on the floor so the entity can be captured.
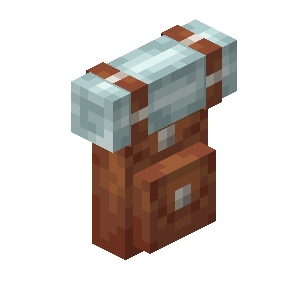 Sealed Satchel
A hex powered inventory that can be worn. It has a slot for a held item, and 3 slots for events. When worn, the backpack inventory will show when the player inventory is accessed. Can also be access by holding it and right-clicking.
The held slot holds any one item. Whatever sits in it counts as held for the satchel's own hook hexes, ahead of anything you wear or carry. A seal is the usual thing placed here.
Hooks may read the slot, they can never write to it.
The Three hooks: On Open, In and Out, are fired as the window opens, as something is deposited, and as something is withdrawn. Simplest way to use them is to use the patterns from The Vault Seal with a seal in the held slot.
The hook slots can take any iota holder.
Hexbound Chests and Sealed Satchels funnel their hexes through the person opening them, consuming their media. The opener is protected against any mishaps but there's no protection against what the hexes contain, be careful what strange chests you open!
The satchel can be given a fresh new look using Caster's Glamour! Use it to cycles through and sport the one you want. It can also be dyed!
 The Hexbound Chest
A hex powered chest. It has a slot for a held item, and 3 slots for events.
The held slot holds any one item. Whatever sits in it counts as held for the chests own hook hexes, ahead of anything you wear or carry. A seal is the usual thing placed here.
Hooks may read the slot, they can never write to it.
The Three hooks: On Open, In and Out, are fired as the window opens, as something is deposited, and as something is withdrawn. Simplest way to use them is to use the patterns from The Vault Seal with a seal in the held slot.
The hook slots can take any iota holder.
Hexbound Chests and Sealed Satchels funnel their hexes through the person opening them, consuming their media. The opener is protected against any mishaps but there's no protection against what the hexes contain, be careful what strange chests you open!
 Vaults
Tiny pockets of reality created using fragments of the World Crystal and reached through a portal you can open anywhere. Used by the long gone Hex Wrights to store their personal wealth and treasure.
Blank Vault Keys are made at the Essence Forge.
First use forces the creation of a reality pocket.
After that, using the key opens its Vault wherever you happen to be standing. Use it again to close the door. Doors automatically shut when you move away.
The quality of the key affects the size of the reality pocket that's created. The better the quality, the bigger the vault.
The truly skilled can create Masterwork vaults, which resemble a large demiplane rather than a small bubble of reality.
It's rumoured that some of the original
Hex Wrights' vaults still exist. Masterworks that were used as residences and workshops. They're now considered rare artifacts.
A door remains open if anyone stands near either side of it, and closes on its own a few seconds after it's left unattended.
It will never automatically close while someone is still inside.
A Vault cannot be opened from within the a Vault.
You can create a copy of a key by crafting a blank key with a non-blank key. The blank key is consumed and you get back the original key and a copy of it. Both keys point to the same vault. Important to note only one door to the vault can be open at a time, so a door can move if someone uses their key when it's open.
Don't just let anyone wander in!
You can configure who your door lets through. Set to allow only some, it becomes a wall to everyone not given access.
By default vault doors are open to anyone.
Toggles that player into the held key's Vault allow list.Costs 1/10 Dust
Can only be case from inside a vault. Vaults door will relocate to the vector given.Costs 50 Dust
Bounded GeometryDefine complex and large regions of space as iota without having to create lists of vectors.
RegionsA region is a bounded piece of space, represented as an iota.
Instead of it being a list of vectors, it's stored as a mathematical representation of the space, opening up the possibility of areas larger than a list of 1024 vectors.
Making and combining regions requires no ambit and costs no media, it's a pure mathematical construct. You can draw a sphere a thousand blocks wide, a thousand blocks away and cut it to pieces.
Ambit only matters when interacting with the world in that region.
Vector marks the centre and the number is the radius. A radius of 0 will give 1.
The axis-aligned box between two opposite corners. Which corner you give first makes no difference.
Vectors are two points the cylinder runs between and the number is the radius
A cylinder is not confined to the three axes. Give it the endpoints of a diagonal and you get a diagonal cylinder.
Two endpoints at the same place results in a mishap rather than a very short cylinder.
 Shaping Regions
Regions can be combined, intersected, diffed and sliced and the result is a new region representing those changes. This makes creating complex shapes efficient, by keeping the representation of a region as maths, rather than lists of vectors.
Creates a region that only has blocks existing in both regions.
Returns the first region with any blocks overlapping with region two removed.
Splits a region along the plane through a point with a normal. Produces the positive and negative sides.
Queries if the vector exists in the region and returns a bool. Does not need ambit.
 Executing Regions
These patterns take a region and run something against it. Unlike shaping a region, these patterns rely on ambit.
Returns true if the whole region lies within your ambit, false if any part of it is out of reach.
Returns a list of all entities within the specified region, ordered from centre out.
Runs a pattern over the region exactly as a thoth would, seeds the stack with each vector in a region.
Not a real thoth.
Using a Region Thoth turns a purely mathematical representation of a region into a list of a vectors that's iterated over. This means the stack length limit comes into effect.
Region Fill and Region Break skip the per-position walk of a Region Thoth entirely, changing every block in the region in one go. Cost is the same as if you used a Thoth and individually broke or placed blocks.
Fills every replaceable block in the region and operates the same as place block.
Breaks every block in the region, dropping what each would drop. Air and unbreakable blocks are skipped and not charged for.
 Remnants
Extract the essence that makes up a creature and turn it into your own power.
 The Reaping
In their pursuit of creating Golems, Hex Wrights discovered that the physical traits and abilities of monsters could be stripped from them at the point of death, when their mind relinquished it's grip.
These remnants were then infused into atificial stone bodies to give them traits.
Tears everything a fresh corpse has to give into a Remnants iota.Costs 1 Dust.
You can only reap the recently deceased and you'll get a mishap if you use this pattern on the living, long dead or a corpse that's already been reaped.
There's only a small window of a second before the bodies energy is too dissipated.
Remnants can be stored on any casting medium that takes an iota however extraction is not a perfect process and remnants will degrade over time, becoming less potent. The best way to make full use of them is to distill them straight away.
 Distillation
Remnants themselves are useless, they're scattered energy that represent all the traits the creature had when living. To be useful, we need to distil one Remnant. It's best to do this quickly as Remnants quickly degrade, even when stored. The same goes for distilled Remnants. Get them in a bottle!
Takes a Remnants Iota and returns a string list of the Remnants present, in order.
Reflection is useful for querying the Remnants, as different mobs have different Remnants. You might prefer to always take a Might Remnant if present, over a Vitality Remnant, so querying them allows you to create logic to extract Remnants under specific circumstances.
Distils one remnant from the remnants, by index or name. Empty if not present.Costs 1/4 Dust.
The Hex Engraved Bottle
A Thin Hex Etched glass bottles created at the Essence Forge to hold a remnant. The better the quality of the bottle, the greater the amount of rems, a measure of potency, can be held. A bottle can only hold one type of remnant at a time.
Generally a mobs remnant will have about 100 rems, which is the equivalent of 1 crude bottle.
A bottle can be filled by writing a Remnant Iota to it using scribes gambit or chronicler's gambit. The Hex inscribed in the glass will then convert this into a stable Hexid (Hex Fluid). To empty it, just write null to the bottle. If you write a greater amount that it can hold, the excess will be lost.
Make sure you store your Remnant in a bottle or tank as they will eventually degrade. You get 5 minutes at full strength and then an hour, during which it will degrade to nothing. Once stored they will last indefinitely.
Takes an Item Stack of a bottle and returns the contained remnant's name, and quantity of Rems.
Draws num rems out of a held bottle. A number larger than the bottles max will return entire contents.
We're unsure if the original Hex Wrights ever did the same experiment that one of our lead researchers did.
They discovered that by drinking these Remnant Hexids, they could temporarily adopt their traits! Through rigerous experimentation it was determined that 10 Rems equals 1 second.
Sneak right clicking lets you place the bottle on at the angle you're facing on a block. If the block is destroyed, via any means, the bottle turns into an item available to be picked up.
 The Seven Vitals
Vitals are the physical category of a Remnant. Everything has Vitality, their life force, even the undead. The other 6 vitals depend on the creature itself, some could have might whilst others have impact. They all give different effects when drank.
Vitality Instantly and heals you, a heart per 40rems
Might: Strength
Alacrity: Speed
Aegis: Resistance
Ballast: Knockback resistance. 400 Rems gives full immunity
Impact: Your attack has knockback
Bound: Jump Boost.
 The Ten Traits
Traits are different to Vitals. They're Remnants of creatures that reflect what they could do. These Remnants temporarily grant these abilties when drank.
Ember: Fire Resistance
Tidebreath: Water Breathing
Gravesight: Night Vision
Levity: Slow Falling
Venom Your attacks have poison
Slipstream: Increase swimming speed
Repast: Restores hunger, then Well Fed
Rime: You cannot freeze
Guile: Invisibility
Eloquence: Grants Hero of the Village, and its discounts
 Boss Remnants
Bosses are unique creatures, with unique abilities, so their Remnants are always the most prized.
Make sure you bring a good quality bottle with you, as their Rems are roughly 180, far too much for a crude or sound bottle.
Shardskin from the Quartz Golem. Attackers are hit with quartz
Adamant from the Ancient Golem. Makes you highly resistant to almost all damage, but also weighs you down.
Blight from a Wither. Your hits give blight.
Ascendant from the Ender Dragon. Gives flight.
Tremor from the Warden. Everything alive within 24 blocks glows, through any amount of stone.
Interdict from an Elder Guardian. Hostiles within 12 blocks are slowed and weakened.
 Hexid
Tanks that hold media dissolved in water, or remnants in bulk.
The Hexid Tank
A tank holds either Hexid or remnants suspensions.
Tanks can be built up to to 6 blocks high. Each block holds 4000 mB.
Hexid is water with media dissolved in it. Fill a tank with water buckets, then right click it with anything holding media to dissolve that media in. Saturation is how close the tank is to its ceiling of 1 dust per mB, so a full six high tank tops out at 24,000 dust.
Recharge Item cast at a tank adds media.
Tanks aren't on any tablet; you learn them by standing in a room that still has the plumbing running.
One place does: the corrupt laboratory buried in a lost workshop. Walk into it and both recipes appear at the Essence Forge.
Neither is graded, so there's no timing round: pay the essence and take the result. Pipes come 8 to a craft.
Hexid Pipes join every tank they reach into one vessel.
Sneak place a pipe to lay it in a straight line instead of joining to compatible blocks around it, like other pipes.
Tanks holding different things won't mix and the pipes will break if attempted.
Remnant StorageA tank is bulk storage for remnants. It holds 2000 rems per block, so a six high tank holds 12,000, with no degradation.
Remnants can only be added to empty tanks or tanks containing the same remnant.
Right click the tank with a filled Hex Engraved Bottle to pour it in.
Chronicler's Gambit aimed at a tank can also add Remnants to the tank.
Mixed Remnant tanks can't be created by eiter method.
Right click with an empty Hex Engraved bottle to fill it up to that bottle's capacity.
You can't mix Remnants, the bottle must either be empty or contain the Remnant you're extracting.